Transforming an open-air pole barn from a simple roofed structure into a fully enclosed, functional, and comfortable space is a significant undertaking. It’s a project that goes beyond basic construction, blending rugged framing with the finer points of building science to create a durable, energy-efficient building that will stand the test of time.
This guide is designed to be a definitive resource, reflecting decades of construction experience and deep technical expertise. We will cover every critical step, from the foundational planning to the final acoustic touches, providing insights you won’t find on a standard DIY blog. We’ll delve into the fundamental science of the materials and explore advanced techniques that ensure a professional-grade result.
Chapter 1: Planning, Permitting, and Foundation – The Critical First Steps
Before a single 2×6 is cut, the success of your project is determined by meticulous planning. Rushing this phase is the most common mistake and can lead to costly rework and frustrating delays.
Standard Application
The first action is to contact your local building department. Every municipality has different requirements for converting an agricultural structure into an enclosed space, especially if it will be inhabited or used for commercial purposes. You will likely need to submit a plan for review and obtain a building permit. Your plan should include wall framing details, the locations and sizes of doors and windows, and specifications for electrical and potentially plumbing systems. Once permits are in hand, you can prepare the site, ensuring you have a level base, good drainage away from the structure, and typically, a concrete slab floor.
Going to the Finest Level
The concrete slab is more than just a floor; it’s the foundation of your enclosed environment. The composition of the concrete mix itself is critical. A standard “4000 PSI” mix is sufficient for most applications, but the real key to a long-lasting slab is moisture control. Before the concrete is poured, a high-quality vapor barrier (a minimum of 6-mil, but preferably 10-mil polyethylene sheeting) should be laid over a sub-base of compacted gravel. All seams in the barrier must be overlapped by at least 12 inches and taped.
This barrier is absolutely essential to prevent ground moisture from wicking up through the concrete slab via capillary action. This moisture can ruin flooring, elevate humidity inside the building, and contribute to a cold, damp feeling. For a truly superior slab, consider adding 2 inches of rigid foam insulation under the vapor barrier. This insulates the slab from the cold ground, making the floor significantly warmer and the building more energy-efficient, a detail often overlooked but deeply appreciated in colder climates.
Most guides mention a vapor barrier, but they fail to emphasize its placement and the science behind it. For maximum effectiveness in a heated building, the insulation should be placed directly against the earth, followed by the vapor barrier, and then the concrete. This configuration, detailed by building science experts like those at Building Science Corporation, keeps the entire concrete slab within the “conditioned” (heated) envelope of the building. This turns your floor into a thermal battery, storing heat and releasing it slowly, which stabilizes the interior temperature and reduces the load on your heating system.
Chapter 2: The Structural Skeleton – Framing the Walls
With the foundation set, you can begin erecting the skeleton that will define the enclosed space. The method you choose for framing will have a lasting impact on your barn’s energy performance.
Standard Application
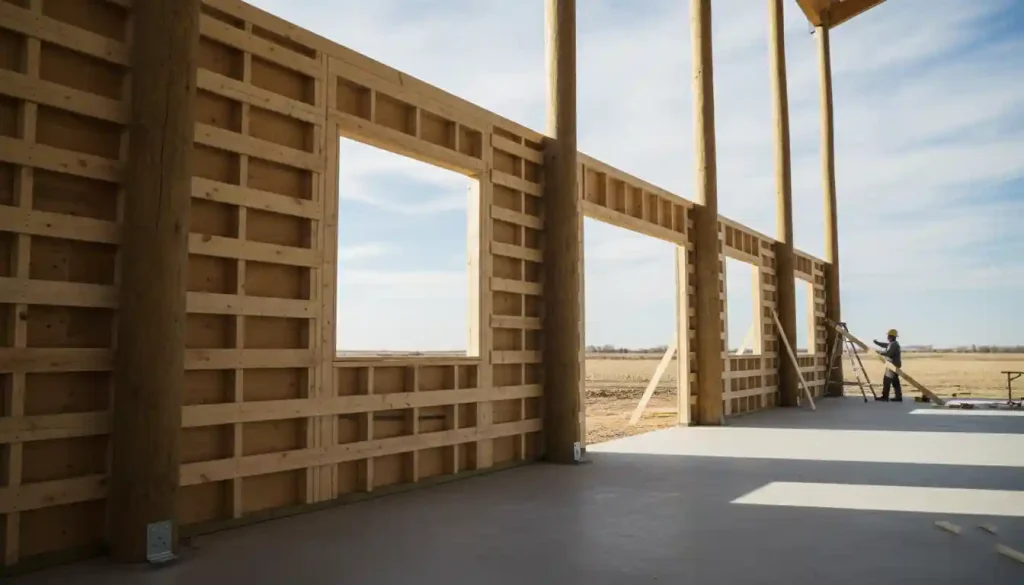
The most common method involves installing horizontal members called “girts” between the barn’s main posts. Typically, 2×6 lumber is nailed to the exterior face of the posts, spaced 24 inches on center. These girts provide the attachment points for the exterior siding. Framing for doors and windows requires adding vertical jack studs to support horizontal headers, which span the top of the openings. In a pole barn, these headers are generally not load-bearing as the roof load is carried by the main posts and trusses, simplifying the framing process compared to a traditional house.
Going to the Finest Level
The choice of lumber and fasteners is paramount. For the sill plate—the bottom-most board that contacts the concrete—you must use pressure-treated lumber. The process, governed by standards from the American Wood Protection Association, forces copper-based chemical preservatives deep into the wood’s cellular structure. These copper compounds are highly effective fungicides and termiticides, preventing rot and insect damage at the most vulnerable point of the wall. At a microscopic level, these preservatives form chemical bonds within the lignin and cellulose of the wood cells, providing decades of protection. When fastening, use hot-dip galvanized or stainless steel nails and anchors, as the copper in modern treated wood will rapidly corrode standard steel.
For a significant upgrade in energy efficiency, use “bookshelf girt” framing. Instead of placing girts on the outside of the posts, they are installed between the posts, flush with the interior edge and supported by girt blocks. This technique creates a deep, uninterrupted wall cavity from post to post. This design is vastly superior to standard framing because it allows for a continuous layer of insulation, eliminating “thermal bridging” through the solid wood posts. Thermal bridging can reduce the effective R-value of a wall by as much as 15-20%. By adopting this commercial-grade technique, you create a far more energy-efficient thermal envelope from the outset.
Chapter 3: The Protective Skin – Siding and Weather Barrier
The siding is your barn’s first line of defense against sun, wind, and rain. The choice of material and, more importantly, the installation method, will determine how well it performs this critical role.
Standard Application
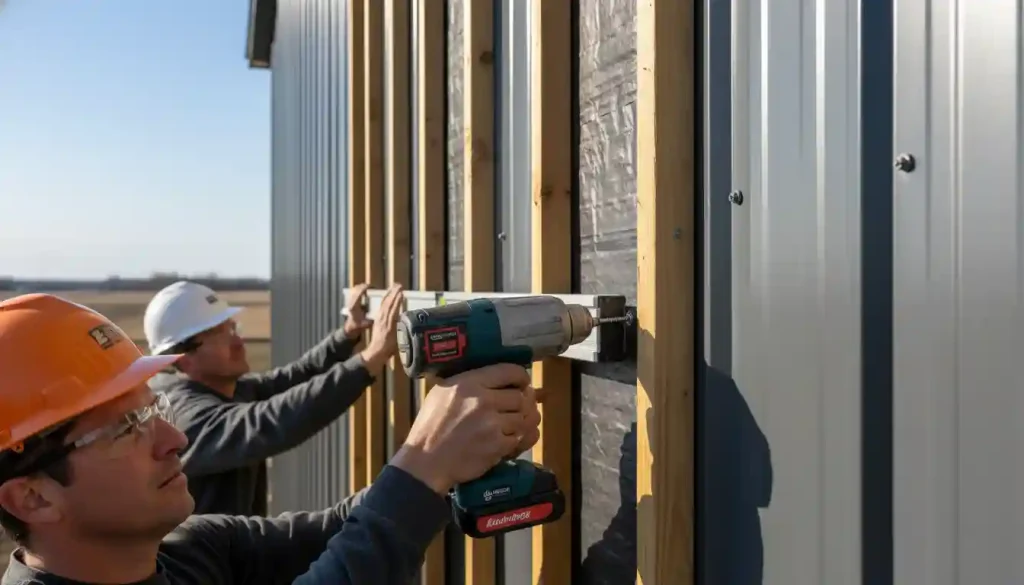
Steel panels are the go-to choice for pole barns, prized for their durability, low maintenance, and cost-effectiveness. Panels are installed vertically, beginning at a corner and ensuring the first panel is perfectly plumb. Each subsequent panel overlaps the previous one, with fasteners—color-matched screws with a sealing washer—driven through the panel into the wall girts. It’s important to use a screw gun with a torque-clutch to drive the screws just until the washer is snug; over-tightening will dimple the panel and can cause the washer to fail over time.
Going to the Finest Level
Specify a premium steel product like Galvalume®. Unlike standard galvanized steel which has a pure zinc coating, Galvalume features a coating of approximately 55% aluminum and 45% zinc. This alloy provides the best of both worlds: the aluminum provides a tough barrier against corrosion, while the zinc offers “sacrificial” protection at cut edges and scratches. The paint finish is equally important. Look for a system using Kynar 500® (PVDF) resin. As detailed by paint manufacturers like Arkema, the carbon-fluorine bonds in this resin are among the strongest chemical bonds in polymer science, providing exceptional resistance to UV degradation, fading, and chalking. This is the difference between a building that looks faded in 10 years and one that still looks vibrant after 30.
To create a truly resilient wall system, install the siding on a “rainscreen.” This advanced technique involves installing vertical furring strips (1×4 treated lumber or composite strips) over your weather-resistant barrier (“house wrap”) before the metal siding is attached. This creates a 3/4-inch air gap between the siding and the rest of the wall assembly. This gap provides a drainage plane for any water that might get past the siding and, critically, it promotes airflow that helps the entire wall assembly to dry out. This pressure-equalized system is the single best way to prevent moisture from being trapped in your walls, virtually eliminating the risk of mold and rot for the life of the building.
Chapter 4: The Thermal Envelope – Insulation and Ventilation
Insulation transforms the barn from a shell into a comfortable space, while ventilation ensures its long-term health. They are two sides of the same coin.
Standard Application
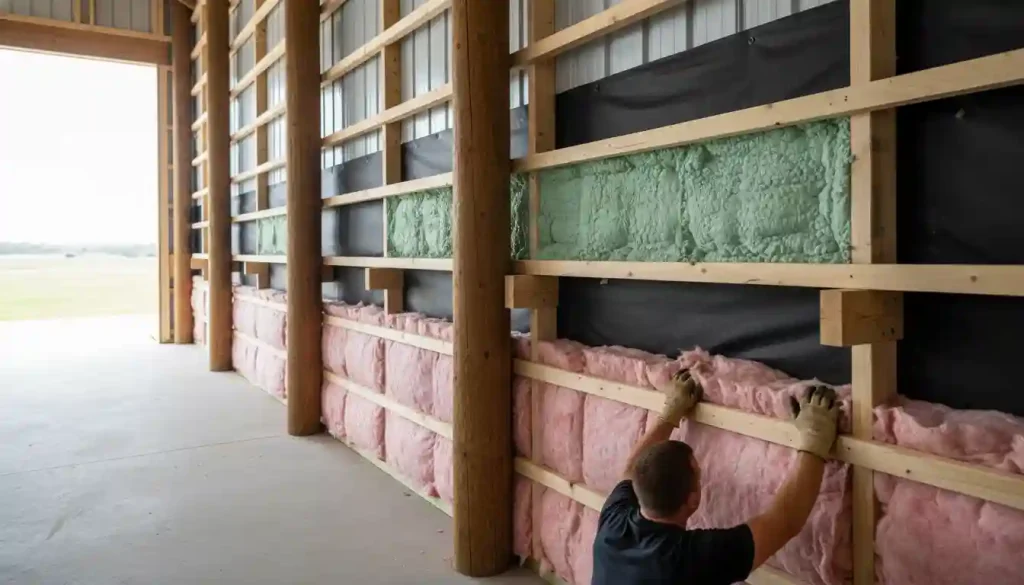
Common insulation choices include fiberglass batts, rigid foam boards, and spray foam. Fiberglass is economical, while rigid foam offers a higher R-value per inch. Closed-cell spray foam is a premium option that provides both a high R-value and an excellent air and vapor barrier. Without proper ventilation, however, even the best insulation can’t prevent moisture problems. Soffit vents and a ridge vent should be installed to allow for passive air circulation in the attic space to exhaust warm, moist air.
Going to the Finest Level
Insulation works by slowing all three forms of heat transfer: conduction (through materials), convection (through air movement), and radiation (via electromagnetic waves). Closed-cell spray foam excels because the blowing agent trapped in its millions of tiny cells is a gas with a much lower thermal conductivity than air, giving it a very high R-value (up to R-7 per inch). It also stops convection completely by creating a perfect air seal. For a truly high-performance system, a vapor barrier’s placement is critical. In cold climates, the vapor barrier must be on the warm (interior) side of the insulation to prevent warm, moist indoor air from reaching a cold surface inside the wall and condensing.
From years of seeing what works, the optimal insulation strategy is a hybrid “flash and batt” system. First, apply a 1-2 inch layer of closed-cell spray foam directly against the interior of the steel siding. This “flash” coat accomplishes two critical tasks: it creates a perfect air seal, stopping all drafts, and because it is impermeable to moisture, it prevents condensation from ever forming on the cold steel. The remainder of the wall cavity is then filled with cost-effective fiberglass or mineral wool batts to achieve your target R-value. This hybrid approach gives you the superior air-sealing and moisture-control performance of spray foam at a fraction of the cost of a full-cavity foam job, representing the best value in high-performance insulation.
Chapter 5: Local and Regional Considerations for Your Barn
To ensure your enclosed barn is successful and meets legal standards, you must tailor your project to your specific location. A pole barn in snowy Michigan has different requirements than one in humid Florida. This section will help you rank in local search results by addressing the key factors relevant to your geographic area.
When planning your project in your location, the first and most important step is to consult the Building and Zoning Department. They will provide the specific local codes you must follow. Key considerations for the region include:
- Snow and Wind Loads: The climate requires that all structures meet specific snow load and wind shear requirements. When you add walls to a pole barn, you increase the surface area exposed to wind. Your framing plan, especially the girt spacing and fasteners, must be approved to handle the wind loads typical for the area.
- Frost Line: In many regions, the ground freezes to a depth of about 36 inches. Any foundation work, including footers for main posts or a thickened-edge slab for a new doorway, must extend below this frost line to prevent heaving and structural damage.
- Material Sourcing: Local suppliers can provide high-quality materials suited for regional soil conditions. For pressure-treated lumber, consider working with a trusted local lumber yard. For custom-fabricated metal siding and trim that can be delivered directly to your site, look into a reputable local metal supplier. Working with suppliers who understand the regional climate can be an invaluable asset.
- Climate-Specific Design: High humidity during the summer makes proper ventilation paramount. A standard ridge vent may not be enough. Consider adding a powered exhaust fan on a humidistat to actively remove moist air from the attic space, protecting your trusses and insulation from moisture damage and mold. This is a crucial step for ensuring the longevity of enclosed barns in the region.
By addressing these local factors specific to your location, you not only ensure a compliant and durable structure but also a building that is perfectly adapted to its environment.
The Acoustic Environment: Engineering the Sound of Your Space
One of the most frequently ignored aspects of a barn enclosure project is acoustics. The inherent design—large volumes, parallel walls, and hard surfaces like concrete and metal—creates a perfect echo chamber. This can make a workshop deafeningly loud or a recreational space unpleasant. Thoughtful acoustic treatment is not an extravagance; it’s a key component of creating a truly functional and enjoyable space.
The goal is to control sound by incorporating materials that absorb and diffuse it.
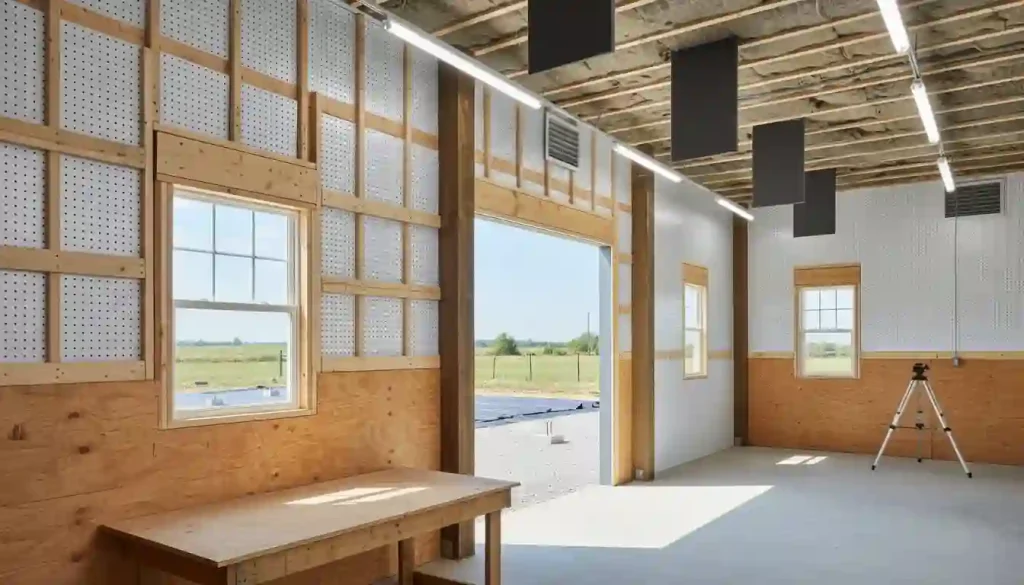
- Absorption: Instead of using standard solid metal panels for the interior walls and ceiling, specify perforated metal panels. These panels have thousands of small holes that allow sound waves to pass through them and be captured and dissipated by the insulation behind. This single choice can be the most effective way to “deaden” a room and reduce reverberation.
- Diffusion: Large, flat, parallel surfaces create distinct, repetitive echoes called “flutter echo.” To combat this, you need to scatter the sound waves. This doesn’t have to be complicated. When designing interior storage, build shelves and cabinets of varying depths. This not only breaks up the flat plane of the wall but also serves as an effective sound diffuser. For the ceiling, instead of a flat surface, you can hang acoustic baffles or “clouds” made from fabric-wrapped mineral wool. According to resources from acoustic treatment specialists like ATS Acoustics, these elements are highly effective at taming ceiling reflections and creating a more comfortable listening environment.
By integrating these acoustic strategies during the construction phase, you can transform a potential echo chamber into a quiet, productive, and pleasant space without compromising the building’s durability or utilitarian nature.
Last Words
Enclosing a pole barn is a smart investment that enhances functionality, protection, and value. By considering local building codes, climate factors, and proper materials, you ensure a structure built to last. With careful planning and quality craftsmanship, your enclosed pole barn will serve reliably for years to come.